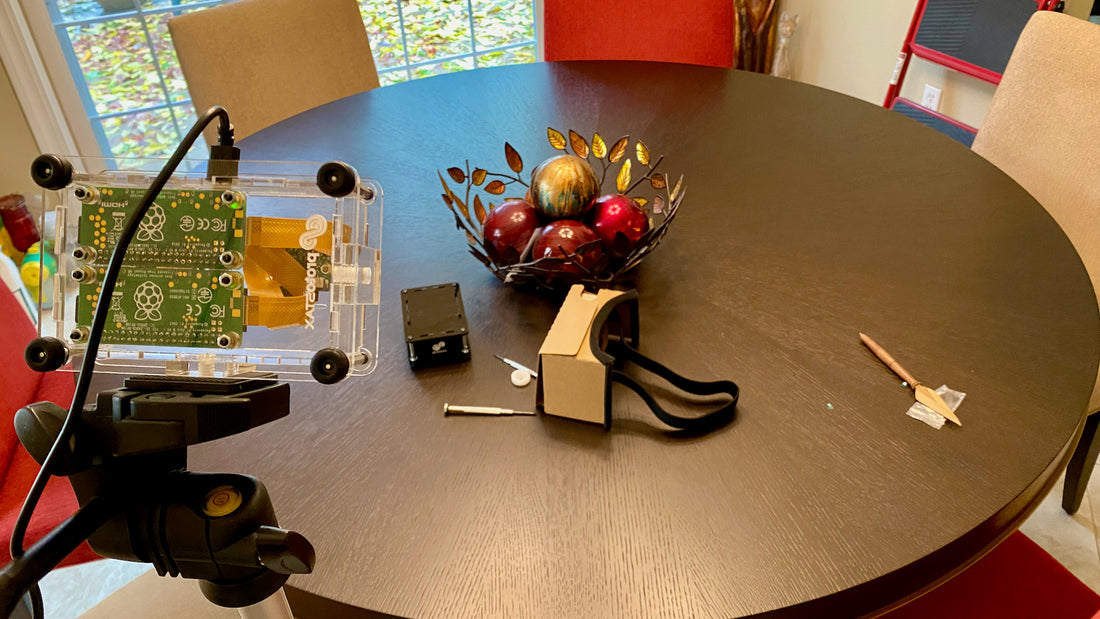
Tripod mountable stereoscopic 3D Camera that transmits a stereoscopic video stream over HTTP to a stereoscopic viewer like Google Cardboard

Stereoscopic 3D images/video attempt to replicate what we see with our own eyes. Your eyes are approximately 2.5 inches or about 6cm (60mm) apart (also called interocular distance). As a result, each eye sees the image from slightly different perspectives and angles. The brain combines these two images into a seamless image and also uses the information to gauge distance and depth. This is also called binocular vision.

We can replicate this with a 3D Stereoscopic Camera, by having two cameras that are separated by roughly the interocular distance. These two images (left image and right image) are then presented individually to each eye using a stereoscopic viewer like Google Cardboard. The brain then combines these images and processes the subtle differences in perspective and angles to create depth perception, or a 3D image!

We'll build a stereoscopic 3D camera using two Raspberry Pi Zeros and two Pi Camera 2s (since each Raspberry Pi can only support one camera). In order to make a usable camera, we also need a proper enclosure.
Here we use the ProtoStax Enclosure for Raspberry Pi Zero, which can accommodate two Raspberry Pi Zeros (what a coincidence! 😊). We also use the ProtoStax Stereoscopic 3D Camera Kit for Raspberry Pi Camera - 60mm Stereo Base which allows you to mount two Pi Camera 2 situated, you guessed it 60mm apart – our interocular distance (also called interaxial distance or stereo base when referring to camera setups)!
We'll use some Python to stream the camera output into a composite left-eye/right-eye browser-based video stream. You can then open this stereo video stream up on a browser on your mobile phone and place it in a stereoscopic viewer like Google Cardboard, and voilà! - we have our 3D stereoscopic Streaming Camera and Viewer!

You can also make the 3D Streaming Camera more portable by using an RPi UPSPack V3 to add a battery backup, so you are not tethered by wires and can move around.
Now you can give a 3D house tour to your Nana or Abuelo without having to make them climb the stairs or leave the comfort of their chair, as you go and operate the camera for them to view remotely!
Or have silly 3D games where you show your friends or family themselves as they view the world you present through the Google Cardboard - turn the camera and point it at them, and watch their reaction as they see themselves in 3D! Quite trippy!
Disclaimer - People with motion sickness can get a bit queasy when viewing VR headsets or stereoscopic cameras. If you start to feel queasy, just ease off the stereoscopic camera viewing! 😊
Ok, let's get started!
Items you will need:
Item |
Quantity |
| Raspberry Pi Zero W (with headers) | 2 |
| Raspberry Pi Camera Module 2 | 2 |
| ProtoStax Enclosure for Raspberry Pi Zero | 1 |
| ProtoStax Stereoscopic 3D Camera Kit for Raspberry Pi Camera - 60mm Stereo Base (shown with long-side and short-side tripod mounts) | 1 |
| Female-female jumper wires | 2 |
| Google Cardboard (or similar) | 1 |
Optional items: |
(for a more portable setup) |
| ProtoStax Enclosure for RPI UPSPack Standard V3 | 1 |
| RPI UPSPack Standard V3 | 1 |
Tools: |
|
| Screwdriver - Phillips #1 | |
| Screwdriver - Slotted 2.0mm | |
| Lens Adjustment Tool for Raspberry Pi Camera |
Step 1: Prepare your Raspberry Pi Zero Ws
If you are starting afresh, you need to first configure the SD cards for your Raspberry Pi Zeros with the Raspberry Pi OS. The Raspberry Pi Imager tool allows you to do some configurations ahead of time when you create your boot image.

Firstly, note that we use Raspberry Pi OS Buster, which is not the latest version (called Bullseye at the time of this writing). Bullseye has made some fundamental changes to camera support. New Raspberry Pi OS releases will no longer support the familiar raspicam apps and Picamera Python library ). The new libcamera apps don't have Python support yet.
As a result, we've decided to stick with Raspberry Pi OS Buster and use the Python picamera library. There is a new picamera2 library in the works for Buster which will add Python support.

Secondly, we assume that the two Raspberry Pi Zeros are called leftcam.local and rightcam.local respectively in our sample code. If you're starting afresh, you may as well name the two Raspberry Pis appropriately when creating the SD card images.
If you already have configured Raspberry Pi Zeros, you can simply update the code with the names corresponding to your Raspberry Pi Zeros.
Since we'll be using the Raspberry Pi Zeros in a headless setup (not connected to a monitor or TV), you'll need to enable SSH on them.


Step 2: Set up your hardware
To make the wiring simpler, we'll have the two Raspberry Pi Zeroes share power, so the setup only needs one power cord (or battery pack hookup in the case of the portable setup). To do that, we connect the 5V and GND lines of the two Raspberry Pi Zeroes via the GPIO headers (we connect pins 2 and 6 in our setup - see https://pinout.xyz/ for more details). Make sure to double- and triple-check the connections as you risk damaging the Pis if the wiring is incorrect.
Additionally, make sure you use a sufficiently powerful power supply that can provide the power needed for both Raspberry Pi Zeroes - the official Raspberry Pi power supply for the 3B+ (with the micro USB) puts out about 2.5A and should be sufficient for the two Zeros.
Start by mounting the two Pi Zero Ws on the ProtoStax Enclosure for Raspberry Pi Zero and the connect the "power rails" via jumper wires, as shown.

Next up, mount the Raspberry Pi Camera 2s to the Top Plate of the ProtoStax Stereoscopic 3D Camera Kit for Raspberry Pi Camera.

Connect the camera wires to the Pi Zeroes. Alternately, you can connect the cameras to the Pi Zeroes before you mount the cameras to the Top Plate! Whatever you find easier!
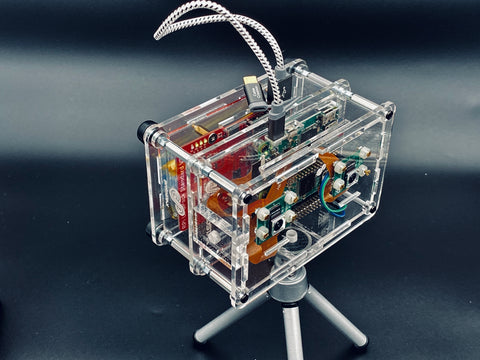
Add the side walls (including the two Tripod Mount side walls from the ProtoStax Stereoscopic 3D Camera Kit for Raspberry Pi Camera), and close everything up.

Here is the final completed stereo camera setup, with an attached Tripod mount adapter plate (this will totally depend on the type of tripod you have!).

Step 3: Configure the Raspberry Pi Zero Ws
Before we can use the cameras, we need to enable the camera interface on the Raspberry Pi Configuration. We can do this via the command-line utility raspi-config , on each of the Raspberry Pis!
pi@rightcam:~ $ sudo raspi-config


Step 4: Configure the Software
You can download the software from GitHub. Alternately, you can install it using git
sudo apt install git
Install on each your two Raspberry Pi Zeros. The program assumes that the two Raspberry Pi Zero Ws are named leftcam.local and rightcam.local. Either name the Raspberry Pi Zero Ws as above, or note their actual names to update in the program
git clone https://github.com/protostax/ProtoStax_StereoscopicCameraPi.git
cd ProtoStax_StereoscopicCameraPi
python3 stream.py
Each program will expose an MJPG video stream of the local camera via a simple webserver of the local video as
http://leftcam.local:8000/stream.mjpg and http://rightcam.local:8000/stream.mjpg
The program also has a home page (index.html) that will expose both video streams as a stereoscopic image (side-by-side), as
http://leftcam.local:8000/ or http://rightcam.local:8000/
(you can access the stereoscopic stream from either url)
You can open the link on your mobile phone browser and place the phone in a 3D stereoscopic viewer like Google Cardboard (or similar viewer) to get a 3D stereoscopic streaming camera on your viewer.
The viewer can thus see everything in 3D. The camera operator can move around to give the viewer a 3D tour from the comfort of their couch!
Step 5: Focusing the camera and other tips
For optimal performance, you can focus the lens of the Raspberry Pi Camera 2 for a crisper image. You can use Lens Adjustment Tool for Raspberry Pi Camera to easily adjust the focus.
For best streaming performance, make sure you don't have too many other programs or services running on your Raspberry Pi Zeros. If you're starting off with a clean slate with your SD card images, this should not be a problem. However, if you're starting with existing Raspberry Pis with already configured SD cards, do ensure that you've stopped and disabled extra services, so streaming performance is not affected.
When you open the stereoscopic streaming link on the browser on your mobile phone, it is best if you hide the toolbar, so extraneous elements are minimized in the viewer. You will need to adjust the phone laterally in the viewer so that the image appears as a single smooth one that appears 3D (and there are no blurry artifacts).

Step 6: (Optional) Make the setup portable with a battery backup
Vertically Stack your setup with a ProtoStax Enclosure for RPI UPSPack Standard V3 containing an RPi UPSPack Standard V3 for a portable setup with backup power, so the camera operator is not bound by power cables. When the battery is low, the camera setup can be plugged back in to provide power and also recharge the battery.
See it in action!
Code Dive
The code for this is based on the Picamera library's Advanced Recipe for Web Streaming of video, which starts recording the camera's video stream to a buffer and then feeds the frames via a http request handler. The web server is started on port 8000. You can see each individual mjpg stream using leftcam.local:8000/stream.mjpg or rightcam.local:8000/stream.mjpg url.
This simple web server will additionally configure both left and right mjpg streams into a single page with split views using some HTML and CSS and provides that in response to the request for the home page (leftcam.local:8000/ or rightcam.local:8000/) or the index.html page (leftcam.local:8000/index.html or rightcam.local:8000/index.html). Thus opening up the home page of either leftcam or rightcam will provide a stereoscopic video stream.
Here is the HTML and CSS used to format the page:
<html>
  <head>
    <style>
      .viewfinder {
        display: flex;
        flex-wrap: wrap;
      }
      .viewfinder-item {
        height: 50%;
        width:  50%;
        object-fit: contain;
      }
    </style>
  </head>
  <body>
    <div class="viewfinder">
      <img class="viewfinder-item" src="http://leftcam.local:8000/stream.mjpg" />
      <img class="viewfinder-item" src="http://rightcam.local:8000/stream.mjpg" />
    </div>
  </body>
</html>
In order for the code to run automatically on bootup, you will want to run it as a service. The GitHub page's README has instructions on how to do that, including the configuration file for the service.
Going Forward:
As always, I like to end by talking about how you can take this project forward with your own additions! Once you get comfortable playing around with the code sample and understanding the code, it is always nice to try to extend your learning by doing more. Here are some suggestions:
- Investigate libcamera apps on Raspberry Pi OS Bullseye to see how they function for streaming video. See how you can incorporate them in your Python program. Keep an eye out for picamera2 (support for Python)!
- Run the python streaming program as a service on the Pis, so they get started automatically when the Pi boots up. The GitHub link has instructions on how you can do that.
- We currently stream the video using the MJPEG format. Look into streaming using MPEG1 or other formats which may give better performance (Raspberry Pi Zero has limited compute power and memory compared to other Pis, so you have to weigh the tradeoffs)
- Add the ability to take a stereoscopic picture - add a button to the Raspberry Pi GPIO and use that trigger taking left and right photos from the two cameras and stitching them together as a stereoscopic duo
Can you think of other ways to extend this project? Share it with us in the comments below! 😊 Also do share photos/videos of your creation on your social media platform of choice - just tag it #ProtoStax and tag us @protostax so we can find you!
Happy Making! 😊
Sridhar